How to Lay Carpet: Step-by-Step Installation Guide
Learning how to lay carpet involves more than rolling out flooring and cutting it to fit. A successful installation requires accurate measurements, a properly prepared subfloor, suitable carpet padding, secure tack strips, and careful stretching to prevent wrinkles.
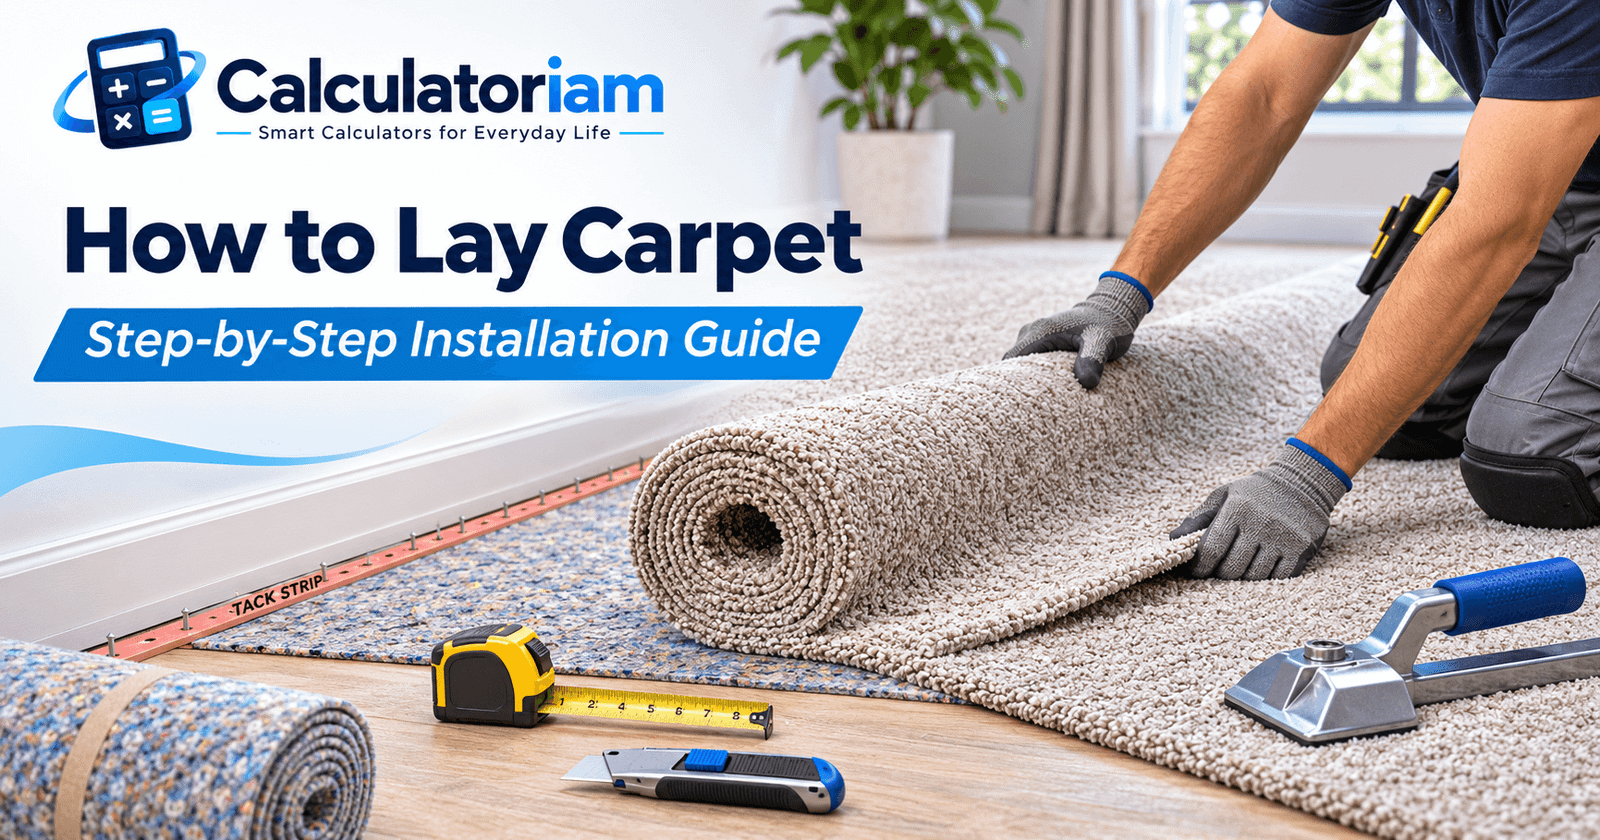
For traditional wall-to-wall carpet, the basic process is to prepare the floor, install tack strips around the perimeter, secure the padding, position the carpet, join any seams, power-stretch the material, and trim the edges.
Installing carpet yourself is possible, particularly in a simple rectangular room. However, the process requires specialized equipment and careful handling. Large rooms, complicated layouts, and visible seams can make professional installation a better option.
This guide explains the tools, materials, measurements, and practical steps needed to install carpet flooring correctly.
What Tools and Materials Do You Need to Lay Carpet?
Before beginning a DIY carpet installation, gather the appropriate tools and materials. Carpet fitting requires equipment that differs from what you would normally use for laminate or vinyl flooring.
| Tool or Material | Purpose |
|---|---|
| Measuring tape | Measures the room and carpet dimensions |
| Utility knife or carpet cutter | Cuts carpet and padding |
| Carpet tack strips | Grip and hold stretched carpet around the perimeter |
| Carpet padding | Provides cushioning and supports carpet performance |
| Hammer and suitable fasteners | Secure tack strips to the subfloor |
| Staple gun | Fastens compatible padding to a wood subfloor |
| Knee kicker | Positions carpet and hooks edges onto tack strips |
| Power stretcher | Stretches carpet to the required tension |
| Carpet stair tool or tucker | Tucks carpet edges along walls |
| Seam tape and seam iron | Join carpet sections when required |
| Straightedge | Guides accurate cuts |
| Safety gloves and knee pads | Protect hands and knees during installation |
A knee kicker is useful for positioning carpet, but it is not a replacement for a power stretcher. The Carpet and Rug Institute’s residential installation guidance emphasizes proper power stretching to help prevent wrinkles and ripples. The Carpet and Rug Institute+1
Choose carpet, cushion, adhesive, fasteners, and seam materials that are compatible with the particular flooring product and subfloor.
Step 1: Measure the Room and Calculate How Much Carpet You Need
Accurate measurements help prevent unnecessary waste and reduce the risk of purchasing insufficient material.
Start by measuring the room’s length and width at floor level. Include closets, alcoves, and other areas that will receive carpet.
For a rectangular room, calculate the floor area using:
A=L\times W
Where:
- A = floor area in square feet
- L = room length in feet
- W = room width in feet
Example: Calculating Carpet for a Bedroom
Suppose a bedroom measures 13 feet long and 11 feet wide.
Substitute the measurements:
A=13\times11
Calculate the floor area:
A=143\text{ sq ft}
Answer: The bedroom has 143 square feet of floor space.
However, floor area alone does not determine the exact amount of wall-to-wall carpet to purchase.
Carpet generally comes in rolls with fixed widths, often including 12-foot and 15-foot options. The selected roll width, pile direction, room layout, and seam positions affect how much material you need.
For example, a 12-foot-wide roll can cover the 11-foot dimension of this bedroom in one piece. Assuming the carpet is oriented appropriately and an illustrative 3-inch trimming allowance is provided at each end, a 13-foot-6-inch cut would contain:
A=12\times13.5=162\text{ sq ft}
The room’s net area is 143 square feet, but the example carpet cut contains 162 square feet.
This distinction matters because carpet purchase quantities are based on the material layout, not simply the finished floor area. Confirm the cutting allowance and roll orientation with your carpet supplier.
For a quick area estimate, use the Calculatoriam Flooring Calculator. It supports room measurements and waste-adjusted area calculations. Its box-quantity features are intended for products sold by carton, so they should not be treated as a carpet-roll cutting plan.
Step 2: Prepare the Subfloor for Carpet Installation
A clean, dry, sound, and suitably level subfloor creates the foundation for a reliable carpet installation.
Before laying new carpet, remove the existing flooring and inspect the surface underneath.
Remove Old Flooring and Debris
Clear the room of furniture and remove any existing carpet and padding.
Next, inspect the exposed floor for leftover staples, nails, adhesive residue, loose materials, and damaged sections.
Vacuum thoroughly to remove dust and small debris that could interfere with installation.
Inspect and Repair the Subfloor
Check for:
- Loose or squeaking floorboards
- Protruding nails or screws
- Cracks, damaged panels, or deteriorated surfaces
- Uneven areas that could affect carpet appearance
- Dampness or evidence of water damage
Repair defects before installing the new flooring.
Carpet padding can soften the feel of a floor, but it cannot correct significant subfloor problems. Installing carpet over damaged or unstable material may leave visible irregularities or contribute to premature wear.
Check Concrete Moisture Conditions
When installing carpet over concrete, verify that the slab meets the moisture and alkalinity requirements of the carpet, cushion, and adhesive system.
A concrete slab can appear dry while still having unsuitable moisture conditions.
The Carpet and Rug Institute’s installation guidance identifies substrate moisture, cleanliness, and surface conditions as important installation considerations.
Do not proceed until any moisture-related problems have been evaluated and corrected.
Step 3: Install Carpet Tack Strips Around the Room
Tack strips, also called tackless strips, are narrow wooden strips containing angled pins that grip the carpet backing.
They allow stretched carpet to remain secured around the room’s perimeter.
Follow these steps:
- Measure the wall lengths where tack strips will be installed.
- Cut the strips to the required lengths.
- Position them with the gripping pins angled toward the walls.
- Leave the appropriate space between each strip and the wall for tucking the carpet edge.
- Secure the strips using fasteners suitable for the subfloor.
- Keep strips out of door openings and other areas where the installation system requires a different termination.
The gap beside the wall should follow the carpet and installation-system specifications rather than an arbitrary measurement.
For concrete floors, use approved concrete-compatible fasteners or another manufacturer-specified attachment method.
Important: Carpet tack-strip pins are sharp. Handle the strips carefully and wear suitable protective equipment.
Step 4: Install Carpet Padding
Carpet padding, also called carpet cushion, sits beneath many traditional stretched-in carpet installations.
Its purpose is to provide cushioning, support the carpet, and contribute to underfoot comfort.
The appropriate padding thickness and density depend on the carpet construction and manufacturer requirements.
How to Lay Carpet Padding
- Unroll the padding across the prepared subfloor.
- Position adjacent sections so their edges meet without overlapping.
- Trim the padding to fit the room.
- Stop the padding at the inner edge of the tack strips so the pins remain exposed.
- Secure the padding using an approved method for the subfloor and cushion material.
- Join padding seams with compatible tape where required.
On a wood subfloor, compatible padding may be secured with staples. Concrete installations may require a suitable adhesive or another specified method.
Avoid unnecessary bunching, wrinkles, and overlapping seams. These defects can create noticeable unevenness beneath the finished carpet.
Not every carpet system requires separate padding. Some carpet products use attached backing or specialized installation systems.
Step 5: Position and Cut the Carpet
After preparing the floor and fitting the padding, bring the carpet into the room.
Unroll it carefully and check that the material is positioned in the intended direction.
Allow Enough Material for Trimming
The carpet should extend slightly beyond the final finished boundaries so its edges can be trimmed accurately.
Avoid cutting the material to the exact finished size before positioning and stretching it.
A piece that is cut too short may no longer reach the tack strips after adjustment.
Check the Carpet Direction
Carpet pile has a directional appearance. Light can make sections look different when their pile directions are reversed.
Where multiple pieces are needed, follow the manufacturer’s layout and pile-direction requirements.
Keep the carpet flat and avoid unnecessary folds that could damage the backing.
For a single-piece installation, proceed to stretching after confirming that the carpet covers the room with adequate trimming allowance.
Step 6: Join Carpet Seams When Necessary
Large or irregular rooms may require more than one piece of carpet.
A properly prepared seam helps create a consistent finished surface while minimizing visible separation.
The basic process includes:
- Plan seam placement before cutting the carpet.
- Align adjoining carpet sections in the correct pile direction.
- Prepare the edges using the cutting method specified for the carpet construction.
- Position suitable seam tape beneath the joining edges.
- Use compatible seaming equipment and follow the tape manufacturer’s heating instructions.
- Bring the carpet edges together without overlapping.
- Allow the seam to cool and stabilize before applying tension as directed by the installation system.
Some carpet backings require seam-edge sealing to help prevent fraying or delamination.
Avoid locating seams in highly visible or heavily trafficked areas when the room layout and carpet dimensions offer a practical alternative.
Seaming is one of the more demanding parts of carpet installation. Incorrect cutting, excessive heat, poor alignment, or improper stretching can create permanent defects.
Step 7: Stretch and Secure the Carpet
Stretching is essential when installing conventional wall-to-wall carpet over tack strips.
Without adequate tension, carpet may develop ripples, buckling, or loose areas after installation.
Position the Carpet Using a Knee Kicker
Start by positioning one edge of the carpet along the selected wall.
Use a knee kicker to help engage the carpet backing with the tack strips.
Follow the appropriate positioning sequence for the room and carpet product.
The knee kicker is particularly useful around corners and other restricted areas.
Stretch the Carpet With a Power Stretcher
Once the initial edge is secured, use a power stretcher to apply controlled tension across the carpet.
Follow the carpet manufacturer’s stretching requirements and the applicable residential installation standard.
The general process involves:
- Set up the power stretcher according to its instructions.
- Position the stretcher head on the carpet.
- Apply controlled tension in the required direction.
- Engage the stretched carpet with the tack strips.
- Continue stretching and securing the carpet according to the recommended sequence.
- Inspect for loose areas, wrinkles, and uneven tension.
Do not use the knee kicker as the sole stretching method for conventional stretched-in carpet.
The Carpet and Rug Institute recommends power stretching as part of proper residential carpet installation. The Carpet and Rug Institute+1
Incorrect stretching can damage carpet backing or leave the surface insufficiently secured. When the equipment or required technique is unfamiliar, professional installation is worth considering.
Step 8: Trim and Tuck the Carpet Edges
Once the carpet is correctly stretched and secured, finish the perimeter.
Use a carpet trimmer or sharp utility knife to remove excess material.
Work carefully so the finished carpet reaches the wall without excessive bunching or exposed gaps.
A carpet stair tool or tucker can help position the trimmed edges into the space between the tack strips and the wall.
Pay particular attention to corners, where unnecessary cutting can create visible gaps.
At doorways, use a suitable carpet transition or threshold system to secure and protect the exposed carpet edge.
The finishing method should match the adjoining floor covering, doorway configuration, and product specifications.
Step 9: Inspect the Finished Carpet Installation
Before returning furniture to the room, inspect the installation carefully.
Walk across the carpet and look for areas that feel loose, uneven, or poorly supported.
Check that:
- The carpet lies flat without visible wrinkles.
- Perimeter edges are securely attached.
- Doorway transitions are correctly finished.
- Seams are properly joined.
- No padding is exposed along the walls.
- Carpet edges are neatly trimmed.
- The installation has not trapped debris underneath.
Vacuum the finished surface according to the carpet manufacturer’s instructions.
The Carpet and Rug Institute also recommends maintaining good ventilation and air exchange during the initial period after carpet and cushion installation. The Carpet and Rug Institute
How to Lay Carpet on Concrete Floors
Installing carpet on concrete follows many of the same principles as installation over wood, but substrate moisture and fastening methods require special attention.
First, inspect the slab for cracks, moisture problems, contamination, and uneven areas.
Resolve unsuitable conditions before proceeding.
Next, select a carpet installation system approved for concrete. Depending on the product, this may involve suitable tack strips and padding or an approved direct-glue method.
For a conventional stretched-in installation, use concrete-compatible tack-strip fasteners and a suitable cushion attachment method.
Avoid assuming that standard wood-floor staples or nails will work on concrete.
If the installation requires a moisture-control system, use only a solution compatible with the flooring materials and verified substrate conditions.
For a basement, investigate any history of seepage, flooding, or elevated humidity before choosing carpet. A consistently damp floor is not an appropriate surface for ordinary carpet installation.
Can You Install Carpet Without Tack Strips?
Yes, but only with a carpet product and installation method designed for that purpose.
Traditional broadloom carpet commonly uses tack strips and power stretching. Other flooring systems may use different attachment methods.
| Carpet Installation Method | Typical Application | Main Consideration |
|---|---|---|
| Stretch-in installation | Conventional wall-to-wall carpet | Requires tack strips, compatible padding, and power stretching |
| Direct-glue installation | Selected carpet systems over approved substrates | Requires compatible adhesive and substrate preparation |
| Carpet tiles | Modular residential or commercial flooring | May use adhesive, adhesive tabs, or another approved backing system |
| Loose-lay carpet products | Specific products designed for loose laying | Must follow product limitations and installation instructions |
Do not install ordinary stretch-in broadloom carpet as a loose-lay product unless the manufacturer specifically permits it.
How to Lay Carpet Squares
Carpet squares, commonly called carpet tiles, have a different installation process.
Typically, you prepare and clean the subfloor, establish layout reference lines, and position the tiles according to the manufacturer’s pattern.
Some products require adhesive, while others use specialized backing or fixing systems.
Carpet tiles do not generally require the same perimeter stretching procedure as conventional wall-to-wall carpet.
Their modular design can make replacing individual damaged sections easier, although installation requirements vary by product.
Common Carpet Installation Mistakes to Avoid
Even a relatively simple carpet installation can develop problems when important steps are overlooked.
| Common Mistake | Possible Result | How to Avoid It |
|---|---|---|
| Measuring only the floor area | Insufficient carpet for the actual roll layout | Account for roll width, orientation, seams, and trimming |
| Ignoring subfloor damage | Uneven or unstable finished flooring | Repair defects before installation |
| Installing over damp concrete | Moisture-related damage and possible mold growth | Verify acceptable substrate conditions |
| Choosing incompatible padding | Reduced carpet performance or warranty problems | Follow carpet manufacturer specifications |
| Overlapping padding seams | Visible ridges beneath the carpet | Fit cushion edges correctly |
| Stretching only with a knee kicker | Wrinkles or rippling | Use proper power-stretching equipment |
| Cutting carpet too early | Gaps along walls | Retain adequate trimming allowance |
| Poorly joining seams | Visible or separating carpet edges | Use the specified seaming method |
Most installation problems are easier to prevent than repair after the carpet is fully secured.
Is It Hard to Install Carpet Yourself?
DIY carpet installation is possible, but traditional wall-to-wall carpet is more technically demanding than many beginners expect.
Measuring the room, removing old materials, and preparing the subfloor are relatively approachable tasks.
The more difficult stages involve accurately cutting carpet, forming seams, operating specialized stretching equipment, and finishing edges without damaging the material.
A small rectangular room with a single carpet piece is generally easier than a large area with multiple doors, corners, and seams.
Professional carpet installers may be preferable when:
- The room requires multiple seams.
- The carpet is expensive or difficult to handle.
- Stairs or complex floor layouts are involved.
- The subfloor has significant defects.
- Specialized tools are unavailable.
- Manufacturer warranty conditions require particular installation procedures.
If hiring an installer, ask whether the work will follow the applicable CRI residential installation standard and the carpet manufacturer’s requirements.
Frequently Asked Questions About Laying Carpet
Can you lay new carpet over old carpet?
Generally, removing the existing carpet is the better approach for a conventional installation. Old carpet can conceal moisture, dirt, damaged materials, and uneven conditions. Unless a manufacturer specifically approves an alternative system, remove the old carpet and prepare the underlying surface.
Do you need carpet padding under every carpet?
No. Many residential stretched-in carpet installations use separate padding, but some carpet tiles, direct-glue products, and specialized carpet systems do not. Follow the requirements of the selected carpet.
How do you install carpet in a room without seams?
Choose a carpet roll width and cutting layout that can cover the room in one piece. Allow sufficient extra material for trimming and stretching. The room’s overall dimensions, carpet orientation, and available roll widths determine whether a seamless installation is possible.
Can you install carpet directly on concrete?
Yes, provided the carpet system is approved for concrete installation and the slab meets its moisture, surface, and other substrate requirements. Direct-glue and stretched-in methods have different material and preparation requirements.
How long does carpet installation take?
Installation time depends on room size, layout complexity, subfloor condition, seam requirements, and installer experience. A simple room may be completed relatively quickly, while repairs, moisture treatment, complicated seams, or multiple rooms can extend the project.
Why does newly installed carpet develop wrinkles?
Wrinkles can result from insufficient stretching, installation problems, movement, environmental conditions, or changes in the carpet system over time. A qualified installer can assess whether professional restretching or another repair is required.
Final Thoughts
Knowing how to lay carpet helps you understand the work involved before starting a DIY project or hiring an installer.
Accurate measurement, appropriate subfloor preparation, compatible padding, secure tack strips, correctly formed seams, and proper power stretching all contribute to a successful installation.
For a straightforward room, careful planning can make the project more manageable. Where complex seams, concrete moisture problems, or specialized installation requirements are involved, professional assistance can reduce the risk of expensive mistakes.
Before purchasing materials, calculate the finished floor area using the Flooring Calculator, then confirm the actual carpet roll layout, cutting requirements, and installation specifications with your supplier.